Hiển thị các bài đăng có nhãn Coach House Remodel. Hiển thị tất cả bài đăng

Thứ Năm, 1 tháng 11, 2012

"It's Only a Shed"


Hi all, Dianne here.  As shown above, the cattle next to our dog park have watched our return with interest!  Our coach house sits right behind the tree line in the background of the photo.  

Not much to update, but I wanted to share a link to a blog which recently showcased our tiny coach house in Texas.  Even if you've seen photos of our coach house on our own blog, there are some great photos which really showcase it here:

"It's Only a Shed"

I've added a permanent link to this blog at the left margin of ours, if you are interested in future tiny coach house posts.

Aside from that, here's a quick update:


I've been riding my bike through the state park next door for exercise, and Tuesday morning I came upon this large bobcat. 

He ignored me for a while, turning to look at me from time to time, then hopped into the brush along the road.


This morning on my bike ride I saw a road runner.  By the time I got my camera out and rode up to him, he ran into the brush to hide.  You can just see his shadow in this photo.  Maybe next time....


Then I had to stop and wait for this flock of chachalachas to cross the road.


Our plantings are growing like weeds!  My tomato plants already have blooms --

They are growing in big pots that we can roll inside in case we get an overnight frost in January.  


My morning glory experiment has been a success! They have already grown to the top of the wire trellises, and each day have more and more blooms.


My wildlife cam has mostly captured opossums and early morning birds, but I did find two rabbits...


A cottontail...


And a jack rabbit...


That's all for now.   We'll post again if and when there's something to report.


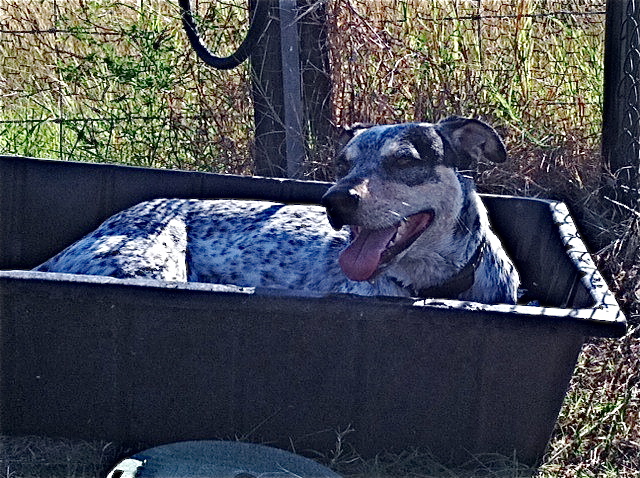
Our pet photo of the day shows Bandido taking a break in the water tub at the doggie park after retrieving his beloved blue whistle ball a hundred times (exaggeration -- just seemed that way).  November is here, and a lot more of his Texas buddies are on their way south for some winter fun.  Bandido and Tequila can't wait to see them, and neither can I!

Thứ Ba, 22 tháng 11, 2011

She's a Project-Lovin' Woman....


Hi all, Dianne here.   (Note:  blogger is acting squirrely and cutting off text.  I apologize in advance, 'cause I can't figure out how to fix it.)  


Back when we had a "real" house in Indiana, the guys at my local neighborhood hardware store once called me a "project-lovin' woman," because I was in there so often buying supplies for whatever I was working on at the moment.  Just to prove that you can teach a 61-year-old woman new tricks, I decided to try to tile our coach house backsplash.  This was the last remaining "finish" item on our to-do list in the coach house. 


This blog may not be of much interest except to friends and family, namely those who know the saga of the Italian tiles.  For those of you who couldn't care less, go ahead and scroll to the bottom to see a cute photo of Charlie the cat watching the pet sitter video on tv.  For those of you with way too much time, continue on....


In September 2004, Roger and I went on a once-in-a-lifetime trip to Tuscany, Italy with a group of friends.  We all pooled our resources and rented an Italian villa at a working vineyard and olive oil agriturismo, Fattoria de Cinciano.  What a wonderful trip!


At the time, we were in the process of remodeling our kitchen.  We purchased a series of hand-crafted Italian tiles and had them shipped to Indiana to be incorporated into our backsplash.  I held back three of the tiles "just in case" we ever sold that house.  Here's how the tiles looked in our kitchen remodel:
Italian Tiles


If you should want to see the entire finished kitchen, here's a link to the other photos: Finished Kitchen 2005.  Those of you who have seen our little coach house will recognize a few items, like the black Silgranite sink, faux copper ceiling, open dish cabinet, kitchen table and chairs, wine rack, and now, my three remaining Italian tiles.  I still have my "dream kitchen," except now it's very, very tiny!  Isn't it Murphy's law that as soon as you get your house just the way you want it, you decide to sell it and move on?  That's just what we did; we have been fulltiming now since December of 2008, so only enjoyed that new kitchen for a couple of years.


I finally summoned up the courage to go to Home Depot to buy my supplies.  While there, I noticed a product called "Simple Mat," an adhesive mat that takes the place of mortar.  I decided to give it a try, and I'm glad I did.  I'll update this blog if the whole wall of tiles decides to peel away from the wall and fall down, but it seems to be solid (so far, so good....)


I'll just describe the process I used in photo captions:

Simple Mat Cut and Applied to Wall

You simply peel the "wall side" paper off and stick it where you want the tile.
The first tile sheet applied 1/8" above counter


When ready to stick the tiles, you remove the "tile side" plastic off the Simple Mat and position the tiles. You have to be careful, because once they're on, it's very hard to reposition them.


Snipping Tiles around Switch Plate Opening


Roger did the Math to help me lay out my Italian Tiles 


Let's just say it's a good thing I married a smart man.  I'm mathematically challenged, and would have goofed this step for sure!


Ready to Install the Third Italian Tile


Grouting is a messy job!

So is wiping the grout!


Caulked and Polished!

The hardest part for me was wiping the grout haze from the little tile faces. Just wiping with a dry cloth didn't work, so I had to wait and use tile cleaner after 24 hours.  I spent a whole afternoon polishing each little tile until it was the way I wanted it.

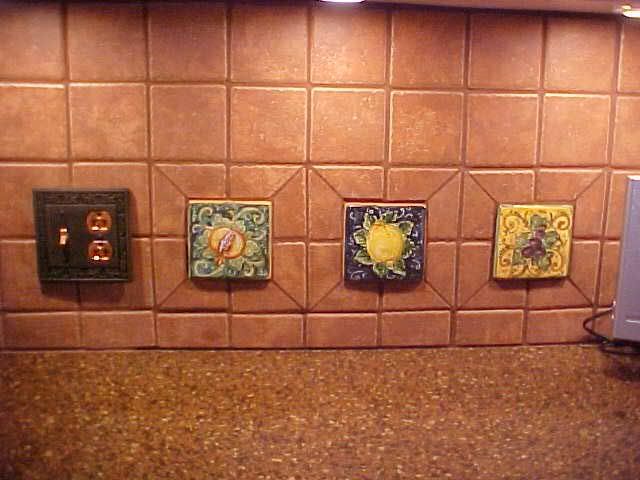
 The mosaic glass tiles are "Midnight Blue" and have shiny copper, black, and white accents throughout the glass. 

 I found a perfect light switch plate to match the copper, but had to order the matching outlet cover.  I also had to readjust the switches underneath and use longer screws on the switch box to make it flush with the new tile.  

Now all I have to do is await my outlet cover and it will be totally finished!

One final touch:  While we were exploring Tuscany on a rainy day, we happened upon a beautiful monastery which allowed tourists. 

We could hear the monks singing as we explored the grounds. 

 In the gift shop, I purchased a small hand-crafted tile as a memento.  It had a lovely cypress tree hand painted on it; it just seemed to symbolize our entire trip, for we saw those lovely trees everywhere in Tuscany.  The little tile is an odd shape and not perfectly symmetrical, so it could not be incorporated into a wall.  It now has a home (hung by fishing line) behind my sink.  All of our things just seem to look better and fit better in our coach house.

The pet photo of the day shows Charlie the cat watching the "pet sitter video" I put in for he and Bandido one evening before we went out.  Bandido watched it for a while, but Charlie was so excited by it that he meowed and jumped up on the dash to look behind the TV to see just how to reach the darned squirrel!

Thứ Hai, 28 tháng 2, 2011

Show & Tell Part 2 -- Finished Coach House


I
Hi all -- Dianne here.  If you are not interested in our coach house remodel, save your time and skip this blog issue!


Seven weeks after our first call to Raul Gonzales, we finished the coach house yesterday with the installation of the painted cabinet doors, knobs, and toilet paper holder.  We are officially done!  This blog will simply be photos and a few explanations.  I say we are officially "done," although there is still the question of what kind, if any, tile or glass backsplash we might install behind the kitchen sink.  We have three hand-painted Italian tiles we purchased in Tuscany that we'd somehow like to incorporate into the backsplash:
Don't want to cross the line into "too much," but I'd really like to use these tiles somehow.  Any suggestions?  We originally considered dark blue tiny glass background with these tiles interspersed. Might still do that.  (We bought the cabinet knobs with that idea in mind.)


As you enter the coach house through the French doors, the first thing you might notice is the tile threshold Roger designed: 


Looking ahead, you would see the view of the kitchen area shown in the top photo.


The sun was so bright that it was hard to get the colors just right, but you can get the idea.    Remember that you can enlarge the smaller photos by clicking on them, if you are interested in a closer view.  


Here's a close-up of the Mexican talavera ceramic knobs we purchased for the kitchen cabinets (The bathroom vanity and cabinet have a different pattern of talavera knob):


Here is a close-up view of the granite countertop.  


More kitchen views:


On the other side of the refrigerator are the two cherry Amish furniture pieces we decided to keep.  They offer great storage:

The north wall has the main front window.  We added a granite ledge to the window shelf.
There's no window covering yet on the windows, so it was hard to get a good photo of it without glare.  


Still turning counter-clockwise, the next view shows our wine rack in the northwest corner.  The large wall art is a compilation of photos of the villa and wine/olive oil bottles from our vacation in Tuscany a few years ago:
Turning next to the west wall, Roger's Grandmother Norris's kitchen table and chairs fit great under the west window.  The chair cushions are also souvenirs from Tuscany.

Another view of the dining area gives a glimpse of our motorhome out the window.  You can see the French doors coming into view, which means we've come full circle in our tour of the living area of the coach house.
The bathroom/laundry is on the south end of the coach house, across a smaller threshold piece:

Straight ahead as you open the door is this view of the bathroom:
You might remember in an earlier blog that I had ordered a Mexican hand-painted talavera vessel sink.  Well, the sad tale is that it broke during installation, and we discovered a replacement wouldn't be available for four weeks.  At that point we were so ready to be done that I hopped into the car and drove to Home Depot for a local replacement.  I actually think this glass sink matches the granite better than the Mexican sink would have.  I wish I could say it was less expensive.

Roger glued the Mexican sink back together and we made it into a bird bath (although they just drink from it) for the gang of 15 mockingbirds that hang around our yard:

Going counter-clockwise again, here's a view of 
the corner shower in the southeast corner:

This shows just how compact everything is, and how every inch counted in our planning.  The next photo shows the edge of the shower and the small space between the shower and my stacking washer & dryer which houses our tiny little Kinetico water softener:
Looking back toward the kitchen area, here's the top of the wall next to the washer/dryer, showing my bird house shelf, and the bathroom side of the stained glass window and door:

Continuing counter-clockwise, beyond the door to the west bathroom wall:
And back to the vanity.  Here's a close-up of the sink and granite vanity top, and the very cool bathroom "tap" as our Canadian friends call it:
Our main use for the coach house is for cooking, eating meals, washing dishes, showers, and laundry.  We wanted an indoor eating area large enough to have friends over for dinner without worrying about the weather.  Our very first dinner guests were Bob and Linda, who will be our next-door neighbors when their coach house is constructed.  (They are our blog friends we wrote about in the prior blogs).  Here's a shot taken at our first "dinner party":
 We opted not to make a sitting area, since our satellite tv/dvr is in the motor home and we have comfy chairs there.  Also, when we're not watching tv, almost all of our sitting time is spent outside on the patio.  All that's left to arrive is the new grill we've ordered.  I have a convection microwave in the kitchen, but no stove, so we ordered a grill with a side burner, since we plan to do much of our cooking outdoors.  

This week our new propane fire pit arrived, just in time for our friends Chuck and Cindy's visit in a little over a week:
I'm including one more patio photo, just because I like it:
Roger and I purchased this solid copper cauldron at an antique store in New Harmony, Indiana in 1973.  It fits snugly into an old chiminea stand, and with water and a solar fountain, is a magnet for the local bird population to get a drink.  

The whippet/doggie photo of the day is entitled "Double-Decker Dogs":
Now that we're finally done with the construction that has taken over our lives since early January, we'll try to make our blogs a bit more interesting from now on, as we begin to actually "get a life" again!